 English


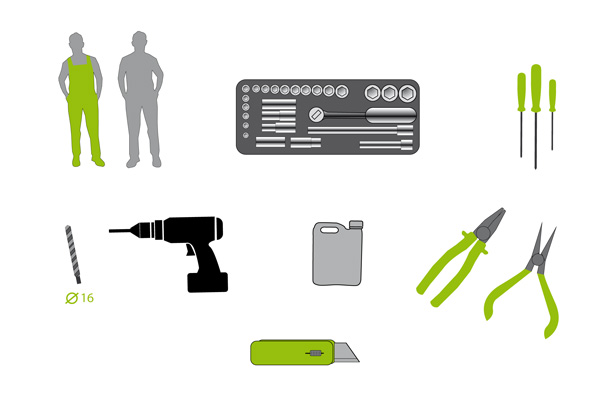
Tools
Identification on a diesel or turbocharged engine
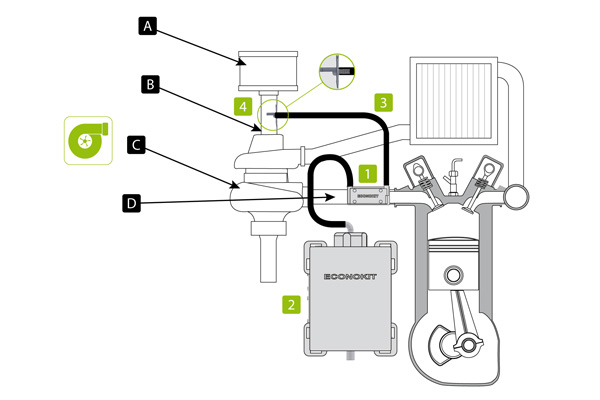
A. Air filter
B. Air intake
C. Turbo
D. Exhaust manifold
- Reactor
- Bubbler
- Silicone hose
- Diesel diffuser
Identification on a gasoline engine with no turbo
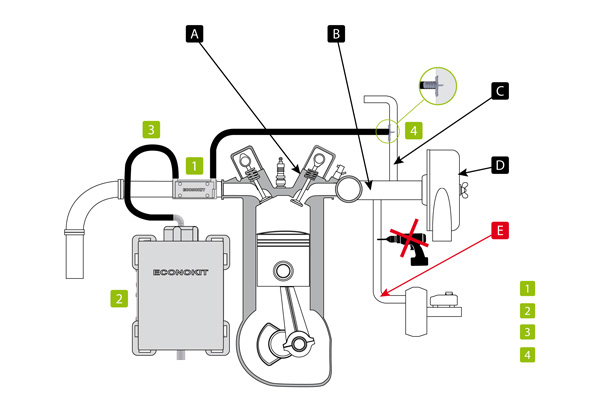
A. Engine block
B. Air admission
C. Canister
D. Exhaust manifold
E. Brake assistance system
- Reactor
- Bubbler
- Silicone hose
- Gasoline diffuser
Important rules
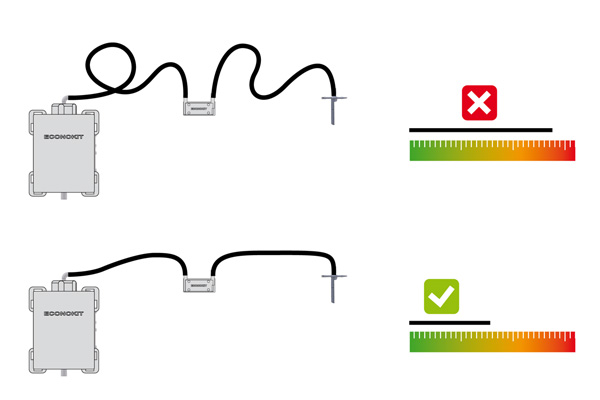
You have to minimize as much as possible the lengths of the silicone hoses.
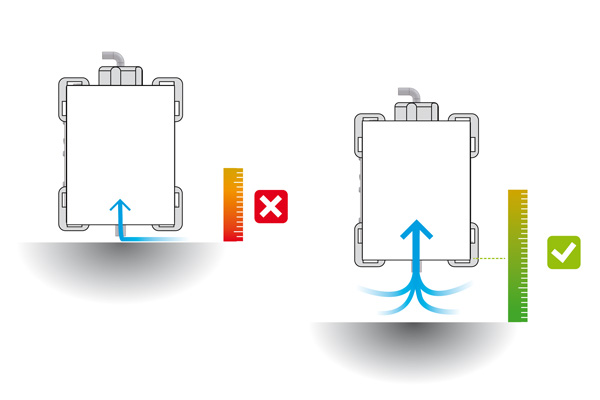
Leave room underneath the bubbler to let the air go through.

Only use rain or demineralized water when filling the bubbler.
Installation
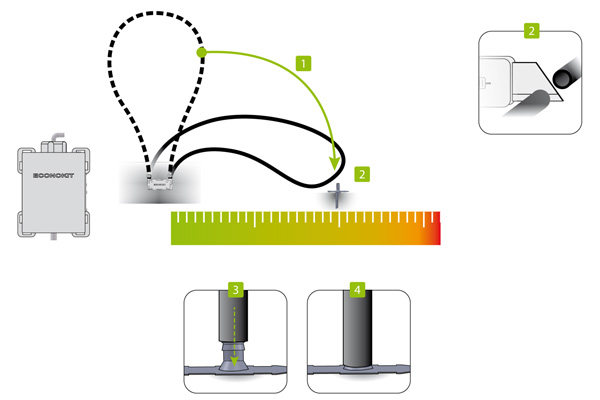
Fix the silicone hose on the reactor without cutting it.
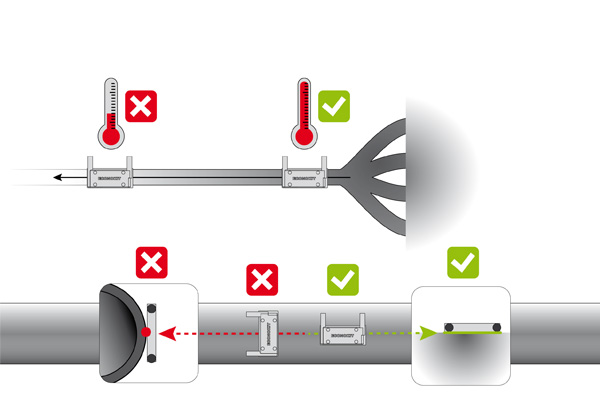
Position the reactor on the exhaust manifold. If it is unreachable, place it on the beginning
of the exhaust line while maximizing the contact surface.
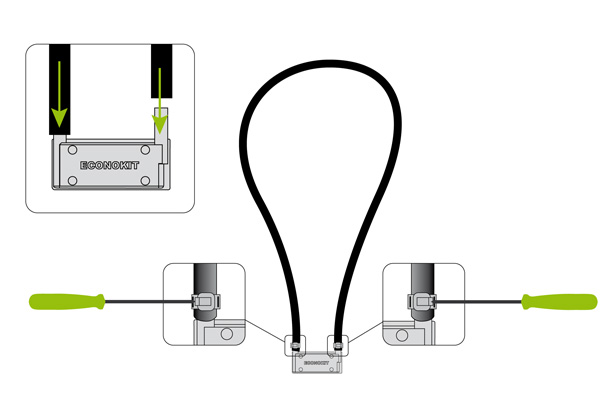
Fix it using the provided metal clamp.
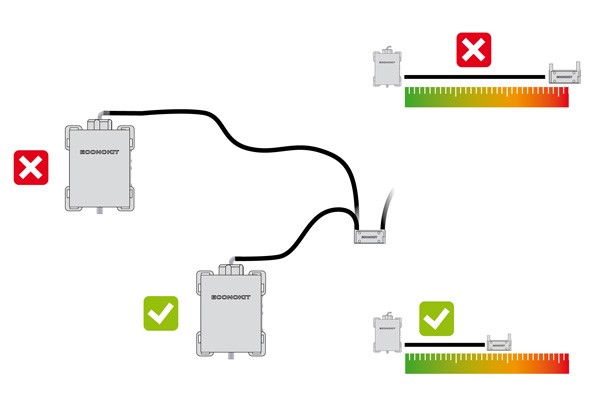
Find a place for the bubbler with the shortest distance between bubbler and reactor.
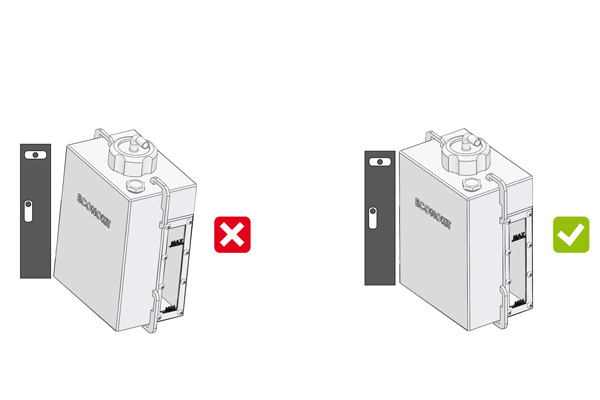
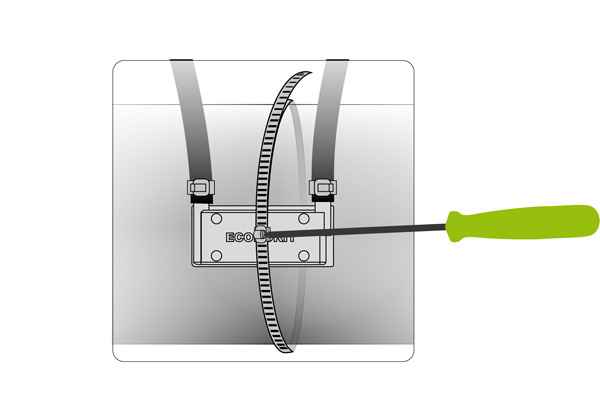
Fix the bubbler straight up using the provided straps, with the window showing.

On a diesel or turbocharged engine
Remove the admission pipe
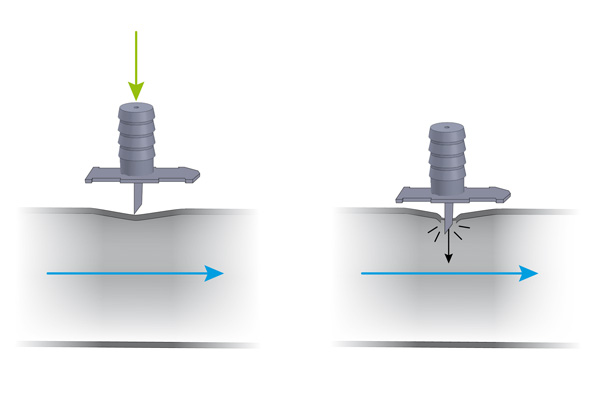
Drill between 5 and 10cm before the turbo where the aspiration is the highest, or at the entrance
of the engine block in the case of an atmospheric engine with no turbo.
Place the diesel diffuser, preliminarily cut (following the mark) if the admission pipe has a diameter
under 8cm.
The diffuser must be placed with the arrow in the same direction as the air flow (air filter -> engine).
Gasoline or non-turbocharged engine:
Put the gasoline diffuser in force in the canister hose or the oil breather of the engine.
Cut the reactor hose at the right length, while minimizing the hose’s distance between the reactor and the diffuser.
Connect the reactor to the diffuser.
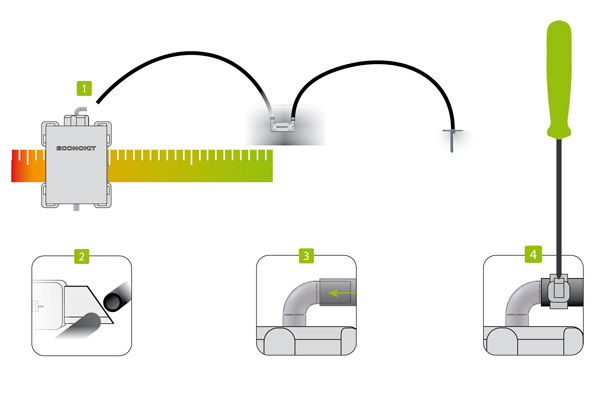
If you need to place a heating probe, choose it depending on the battery type (12V or 24V)
Unscrew the bolt above the bubbler.
Place the heating probe in the top corner of the bubbler and finish screwing it with a wrench.
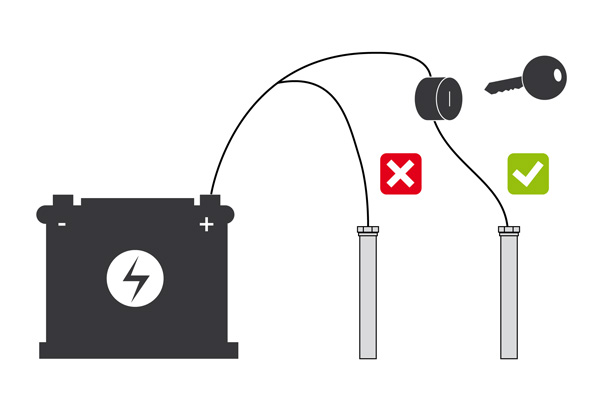
Don’t forget to connect it to the ground

Connect it to an after-contact fuse of 15A or 20A.
Last steps

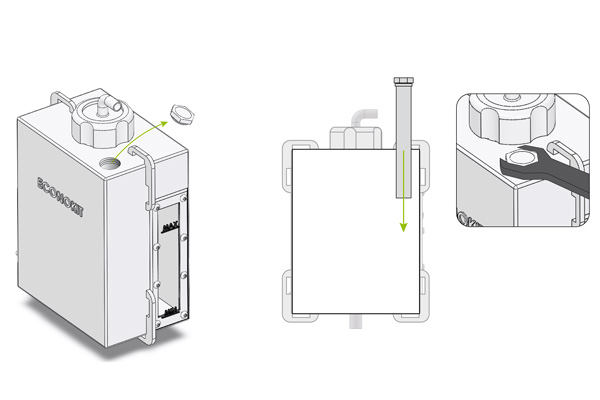
Fill-up the bubbler with demineralized or filtered rain water and make sure not to exceed
the maximum level of water

Verify that the bubbling appears at average RPM.